How I Got Rid of a Yellow Toilet Ring Without Replacing the Seat: A Personal Cleaning Triumph
Let’s be honest: there are few things more frustrating—and frankly, more embarrassing—than a stubborn yellow ring on your toilet seat. It doesn’t matter how clean the rest of your bathroom is; that one unsightly stain can make the whole room feel dirty. For the longest time, I thought the only way to deal with it was to replace the entire toilet seat. But before I made the trip to the hardware store, I decided to try everything—and I’m glad I did.
Here’s how I completely got rid of that gross yellow ring on my toilet seat without replacing it, using simple methods, inexpensive tools, and a little elbow grease. Spoiler alert: it took patience, but the result was worth every second.
What Causes That Yellow Toilet Seat Ring Anyway?
Before you can treat a problem, it helps to understand what causes it.
Those yellow stains are usually the result of a combination of:
-
Hard water minerals (like calcium and magnesium)
-
Urine splashes (yes, even tiny invisible droplets)
-
Cleaning product build-up
-
Prolonged exposure to moisture and poor ventilation
-
Aging plastic reacting to light and heat over time
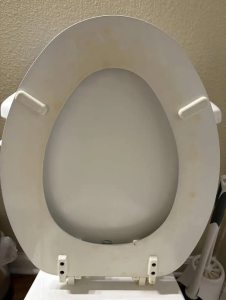
In my case, I had a white plastic seat in a guest bathroom that didn’t get used often—but when it was used, it was usually by visitors who weren’t exactly tidy. The seat had yellowed unevenly, especially near the back hinges and around the inner edges. Gross.
Step 1: Rule Out a Simple Clean
First, I tried basic cleaning with my regular go-to: antibacterial bathroom wipes. That did absolutely nothing. Then I moved on to a scrubbing sponge and some bleach-based bathroom cleaner. Still no improvement. The stain wasn’t just surface-level—it was set in.
This is when most people give up and just buy a new seat. But I was determined.
Step 2: Baking Soda + White Vinegar Paste
This was my first DIY attempt—and one of the most satisfying. I mixed:
-
½ cup baking soda
-
¼ cup white vinegar
It fizzed into a thick, paste-like consistency. I spread it generously over the yellow-stained areas of the seat and let it sit for 30 minutes. Then, using a non-scratch scrub brush (I used an old toothbrush and a sponge with a rough side), I worked the paste into the seat with firm, circular motions.
Result? The yellow faded slightly, especially on the lighter patches. It wasn’t a miracle, but it told me that progress was possible.
Step 3: Magic Eraser – The Game Changer
I had read online that melamine sponges (like Mr. Clean Magic Erasers) could work wonders on bathroom surfaces, so I grabbed one and got to work.
Using nothing but warm water, I started scrubbing the yellow ring with medium pressure.
And just like that—something changed.
The eraser began to lift the deep-set yellow stain, especially near the front edges of the seat. After a full 10 minutes of consistent scrubbing, the difference was incredible. The ring wasn’t gone yet, but it was at least 60% less visible. For the first time, I felt hopeful.
Tip: Rinse the eraser frequently while you scrub so it doesn’t just spread grime around.
Step 4: Hydrogen Peroxide Soak (The Secret Weapon)
Next, I tried what many call the “whitening soak.” I removed the toilet seat (super easy if you have a screwdriver), placed it in my bathtub, and poured 3% hydrogen peroxide all over it. Then I added paper towels soaked in the same solution to keep everything moist and covered the seat in plastic wrap.
I let it sit for 4 hours, checking occasionally to make sure it stayed damp.
When I removed the plastic and peeled off the towels, I was stunned. The yellowing had faded significantly, especially the deep ring that was once near-permanent. I gave it one more scrub with a Magic Eraser while it was still wet—and that’s when the last of the stain vanished.
The seat looked almost brand new.
Step 5: Reinstall and Polish
After rinsing the seat thoroughly and drying it, I reattached it to the toilet. Just to finish things off, I wiped it down with a disinfecting wipe and applied a tiny bit of non-greasy furniture polish. This gave it a soft, clean shine.
No ring. No discoloration. No odor. No need to spend $25 on a replacement seat.
What Didn’t Work (For Me)
I tried a few things that either didn’t help much or were too abrasive:
-
Bleach spray: Didn’t penetrate the stain.
-
Toilet bowl cleaner: Meant for porcelain, not plastic. Smelled strong but didn’t work.
-
Lemon juice + salt paste: Too mild for this kind of stain.
-
Steel wool or harsh scrubbers: Risked scratching the seat.
Preventing Future Stains
Now that the ring is gone, I’ve added a few habits to keep it from returning:
-
I wipe down the seat with a vinegar-based cleaner once a week.
-
I installed a small fan to improve ventilation in the guest bathroom.
-
I encourage guests (via a cute sign) to close the lid before flushing—reducing splashes.
Final Thoughts
This whole experience taught me something simple but powerful: you don’t always need to replace something just because it looks ruined. With the right approach—and a little persistence—you can bring it back to life. That yellow toilet ring haunted me for months. I was embarrassed every time someone used that bathroom. But now? I smile every time I walk past it.